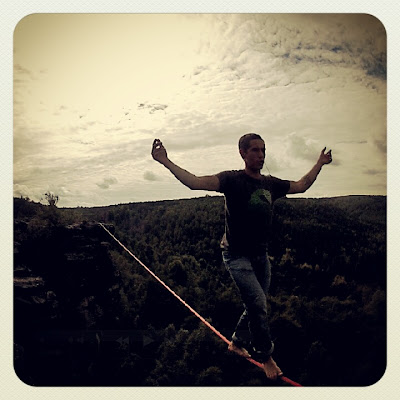
Sunday, October 21, 2012

RodeoLine Training

I can not believe I am slacklining for almost 7.5 years and I did not get into rodeo-lines before. I mean of course I tried and practice that kind of slacklining a bit. I just didn't think it can be so much fun. Well, it just proves again slacklining never gets old and always brings something new ...

For these who might not know, rodeoline is a slackline which is REALLY slack. That means there is no tension on the line at all and usually the line has LOTS of sag in it. Usually that means you have to climb your trees and attach your anchor high above the ground (for example for 20-25m line 3-5m is great!) If the trees have branches it is really easy to climb and fix your spansets (best placement for your anchor would be just above a branch so the spanset can not slide down). If the branches start really high above the ground you will have to climb the trees using two spansets. It is pretty simple; you wrap the tree with a spanset and girth-hitch it. You will need second spanset/sling fixed the same way. Then, simply, put both spansets as high as you can, put your foot in a free hanging loop of the first spanset and stand in it. Next, move the second spanset as high as you can, step on it, move the first spanset up and repeat till you get to the point where you want to fix your anchor ...

Soon, I will post whole article about how to set up your rodeo, different line types, gear tips, photos etc.

Rodeoline is great practice for longlines, highlines and your balance in general. I like how slow you have to react to any movement in the line. What really got me hooked though, was surfing it ("brah!")... It is not easy but also not as hard as I thought it would be. I definitely got lots of inspiration from 'rodeo-surf masters' such as Jerry Miszewski, Johannes Olszewski, Jordan Tybon and Basti Aldehoff.

Jordan going BIG (25m L/4m of sag, Type-18)
My first attempts to surf rodeoline took place during European Juggling Convention in Lublin this year. Piotr Błaszczak and I were doing slackline workshops for almost one week and I had lots of free time on my hands before the Urban Highline Festival. I spent almost whole time on a rodeo line set up with Gibbon 'Classic Line'. It was not a perfect set up but on this easy and short set up I learned all the basics (how to start, surf, sideways surfing, surf-walking etc.)

I followed continuously train rodeo lining and soon moved to 20m length with 3 meters of sag. I was using quite static Gibbon 'Flowline'. You can watch the video down below:


Nowadays I am in Berlin. Amazing place to be, with LOTS of slackers and great slacklining spots ... I went out few times with Jordan for some slackline training (mostly some longlines, 50m of loose threaded 'Slack Spec' and rodeolines rigged with Type-18) ...

On the 123m rigged with Core [OS-FM] (photo by Ingo Thomas)
We did few 25m rodeolines with about 4-4.5m of sag and tried 35m with 5-6m of sag (it was pretty beastly but we manage to progress on it a bit) ... After watching the video of the guy sit-starting while swinging on a rodeoline both of us wanted to learn how to do it. You can see the video below:


Both of us got it first session although Jordan and I have slightly different technique. Good swing and the timing is really important in this move. We had so much practice that right now we seriously can barely sit down because of the sores on our butts...

Swinging sit-start in progress (25m L/4m of sag, Type-18)
All of our session were really fun and we tried to go as big as we can.

Jordan going BIG ... (photo by Ingo Thomas) 
... like a fairy! (photo by Ingo Thomas)
I swear, one day we are going to spin full circle ;) Next ideas to learn are; sitting back down, turning, standing up & turning in one move ... And right now enjoy short clip from the last training session:


Peace & SlackOn!
Janek

Saturday, October 20, 2012

Master of Universe

During amazing long weekend in Ostrov I had a chance to rig and try my best on the "Master of Universe" Highline. It is 96.5m long and around 40m up high. This line means a lot to me and has some quite story behind it ... (to find out more read whole post 'Ostrov Updates')

Jakub Hanuš aka Kwjet Oslaf on the "Master of Universe" Highline in 2010 (photo by Jordan Tybon)
"Master of Universe" was first rigged 2 years ago by Jerry and SWEL Team. At the time Jerry was the only person to send it (OW). In August of 2010 the line was also longest highline on the world (exact 'sendage' date: 27th of August 2010). It was inspiring time and everyone had a good try. Kwjet got to the middle of the line and after crazy fight took a huge whipper. It was amazing to watch Jerry sending this monster!

To get more info go to:
- really interesting and well written POST by Jerry Miszewski,
- full GALERY from the trip to Ostrov in August 2010.

Soon after this the highline history was rewritten again by Andy Lewis who crushed the first 100m highline. The line sent by Andy on 10th of September 2012 - 'Afrodysiac' Highline was 103.5m long and 110m high set up in amazing spot of 'Fruitbowl' in Moab, UT/USA.


This year "Master of Universe" was crushed again! Faith Dickey (USA) established on it new female world record (to read more go HERE) and Danny Menšík (CZ) send the line OS-FM which I believe is the best send in this style on the world till date and I got my new personal highline send and established new polish highline record! It was amazing to watch both Faith and Danny on this line.

Faith put up some amazing fight and sent the line almost both ways. It was heartbreaking to see her fall during FM attempt 1/3rd before the anchor.

Faith fighting the 'Master' (photo by Jordan Tybon)
Somewhere in a middle of the line (photo by Jordan Tybon)
Danny was just amazing. It seemed like the line was piece of cake for him. He had maybe like 2-3 moments each direction when he had to stop and correct the movement of the line. The rest was just pure cruising.

Danny after sending "Master of Universe" Highline (photo by Jean Geoffrion)
I never forgot that 2 years ago I promised myself one day I'm going to send this line too. I just didn't think it's going to happen during trip, but after watching these amazing sends I was super psyched to try and give it my best. After few attempts I managed to send the line AF (with 5 falls). I was really happy about it and this experience opened my eyes. I didn't expect I can send the line or stand back up after the fall in the middle of the line. After getting to the anchor I realized that I just pushed myself further and while doing that I had SO much fun ...

Somewhere in a middle of the line ... (photo by Faith Dickey)
While riding back the line on the 'glider' it hit me how long it actually is ... I was totally sucked out of any energy after this attempt and bunch of free-solo sends on the shorter lines before that. I decided to take a rest and try the next day.

At the morning I felt pretty fresh but the weather was super windy. The friend of mine Petr "Peeto" Kučera was already on the line. He arrived super early coming from Prague trying to send the line before having to head back to his uni. Peeto is really good highliner and watching him falling in a middle and struggling with the wind cooled down a bit my enthusiasm. I decided to warm up by free-soloing 'Czexas' Highline. Five FS full-man walks in a strong wind made me feel pretty confident again , so I packed my stuff and went to the 'Master'.

The wind was raging. I don't even know how many times I tried (must be something around 20 or so) and I had two really good tries when I felt totally solid on the line. In both attempts I got to 1/3 or a bit further and the wind got crazy again. The line was going from straight to 'U-shape' and then to the 'shaking mode'. I knew I'm able to send but I was too tired and too cold ...

Kind of pissed at my self I decided to head down to the pub, say goodbye to the french filming crew, Jordan and his girlfriend and then go back to de-rig the line with Faith. Sitting at the pub I was looking up on the 'Master' and I noticed the line is not moving anymore. The seed of hope was sown ...

When Faith and I got to the anchor it was already 7pm. Faith convinced me to try one more time and I decided to go. Without any expectations I got on the line and stood up. First meters were pretty shaky but then it got much better. Then I realized I am in a middle of the line. I thought "there is no way I am going to fall now! If you fall, I am going to hit myself in a face!". The transition on the 2/3 was hard but last 10 meters I was really fighting for my send. Last few nervous steps and I was standing on the anchor. My legs were shaky, I couldn't believe what just happened. I have to admit I shed few tears. I had no power left for the FM walk and it was already getting dark. We de-riged the line in the dark, and hiked down to the pub.

Just before sending time ...
Shaky beginning (photo by Faith Dickey)
Find me on the line, I am near the end (photo by Faith Dickey)

It is still kind of weird to me to think about it and realize I walked this line. I am super motivated to try more big lines and get better in it. I want to continue longlining and free-solo highlining but that 'long-time focus' big highlines acquire got my hooked. I want more!

Peace & SlackOn!
Janek

Friday, October 19, 2012

Crackhead Colosseum

A while ago Jordan and I had a small highline training mission. Because I'm currently working in Berlin doing some rope access work we have enough time to hang out and slack from time to time. On Sunday we went together to set up amazing urban line called "Crackhead Colosseum" at undisclosed location in Berlin ;)

After 10km bike ride we arrived at the spot. The place is truly amazing. It's an old train repair station next to the S-Bahn station. Lots of broken glass and weird items under the line. We had a great day, met up with Ingo and seshed the line to the max. For the highlights of this day go to the movie down below and take a look on few pictures from Ingo :)


'Ankle-leashing' (photo by Ingo Thomas)
Jordan floating in the air ... (photo by Ingo Thomas)
Cowboy Jordan riding the line like a pro ;) (photo by Ingo Thomas)
Somewhere in da space (photo by Ingo Thomas)
Jordan sending in a swami-belt (photo by Ingo Thomas)
Freesoloco! Ajajaj! (photo by Ingo Thomas)
Slackline Gangstaz fo life! Who's your rigga'?! ;)
Squirrel grab after korean butt bounce combo (photo by Ingo Thomas)
If you want to see really nice pictures from the 1st ascent of this line go to the POST on S.W.E.L. Team blog.

Peace & SlackOn!

Friday, October 12, 2012

Ostrov Updates

Ostrov is a small village located in Czech Republic just on the border with Germany. It is really quiet place with lots of walls and rock towers around it. It's hard to believe the thick forest wasn't here few decades before and the whole area was covered by fields. Nowadays at some of the local highline spots the trees are almost too high ;)

The coolest place in the whole village is campsite and pub 'Pod Císařem' where you can stay and get some delicious check food and beverage. The pub has it's own character and it is really busy on weekends so actually best time to come and highline is during the week.

Sleeping in 'Pod Císařem' (photo by Jean Geofrrion)
Jordan working in a pub ... (photo by Jean Geoffrion)
Well, I don't think I have to describe this place any more. Most of you probably already have been there  and if not you should definitely come and check out this amazing place. It is great for hiking, biking, climbing and most important ... highlining.

Most of the lines around Ostrov have average height of 20m but you can find anything from lower up to around 50 meters. The length of the lines is even more diverse; you'll be able to choose from multiple already existing lines from 6 up to 96.5 meters range ("Master of Universe" Highline).

Kwjet on the "Master of Universe" back in 2010 (photo by Jordan Tybon)
There is much more potential for mid-sized lines and BIG ones. Depends on the area you can also experienced different kinds of exposure. Most of the lines are in/above the forest or are exposed just one one side but the lines in between rock towers (for example Himmelreich Area).

Himmelreich Area (photo by Jordan Tybon)
In Ostrov rigging the lines is big part of heaving fun. You can not bolt because of the sandstone climbing traditions and ethics so you have to be creative and sling rock towers, blobs, put knots tight on spansets or pieces of wood/rocks as your caming devices in a cracks.

Jan & Kwjet slinging big tower (photo by Jordan Tybon/2010)
Because of all these reasons I really like coming back to Ostrov and it is a great area for practicing and mastering your highlining and free-solo skills. You can send without protection on really mild lines or get REALLY scarred.

FS on the "No Gods No Masters" Highline (28m L/28m H)
OS-FM-FS on the "Rainmaker" aka "Free Some" Highline (14m L/35m H)
This place is not only special to me but my friends and whole slackline community. Faith Dickey is currently leaving in Ostrov, establishing new lines and raging really hard, Jordan Tybon walked his first highline without protection there and the whole area hosted multiple slackline festivals and meetings (including Petzl Slack Trip or annual Girls Only Slackline Festival).

Jordan on the "Alterweg" Highline just before his first freesoloco (photo Jan Galek)
Faith and Jan (Kletter Kiddies) together in Ostrov (photo by Jean Geoffrion)
Lately the SWEL team or its team members were really active in Ostrov. Faith and Jordan set up "Yum Yum" Highline for the German TV show "RTL Nacht Journal". Faith worked together with Kletter Kiddies and the payoff of this cooperation is the movie called 'That Slackline Girl'. I have to admit it's really well done and unique. You can watch it down below:


Also, whole Somewhereelseland Team gathered in Ostrov to shoot footage for a French TV show which should be released really soon. It was really fun times! Faith put up two new female world records sending her longest FS highline ("28 Hertz" 28m L/25m H, FM) and longest highline ("Master of Universe" 96.5m L/25m H, HM). Jordan, Faith and I sent "Czexas" Highline (22m L/22m H, FA: F. Dickey) freesoloco style. I think I had like 10 leashless full-man sends on this line and even added few simple tricks. During that time, Jordan and I also waked another line without protection. "No Gods No Masters" sent first by Jordan is 28m long and 28m height scary line in between two rock noses. I mean the line itself is maybe not so scary but when you step on it it is quite intimidating feeling. I've sent the line the line FM plus one extra walk. Didn't have enough motivation to walk back the more scary direction. I was really happy to hear Jordan free-soloed the line too (HM). It is really proud send and he didn't plan it at all but you know how it is; first swami, then shackle, ankle-leash ... and "why not? I already free-soloed that shit" ;). I was also really surprised to send "Master of Universe" (96.5m L/25m H) too (OW). Soon, more about my new personal and polish highline record :) !

Jordan being happy after full-maning "Czexas" Highline (22m L/22m H)
Just before sending "Master of Universe" Highline (96.5m L/25m H)
Last but not least one week ago I came back to Ostrov again. I went with few friends (Magda, Cinek and Brzezik) to set up new highline I saw next to "No Gods No Masters". It is a really nicely exposed short gap. I had a pleasure to set it up with my peeps ;) It was a fun set-up involving lots of spansets on the tensioning side and hauling big wooden log for an A-frame and on the other side wedging piece of wood inside a crack. I've sent the line free-solo OS-FM. I thought it's a first ascent but I spoke with Stefan from Landcrusing and they did this spot back in April 2008 (to see photo gallery click HERE, from photo 13/35). On of my anchors was rigged a bit differently so I go with the original name "Rainmaker" (and mine aka. 'Free Some') ;) ... Faith put up 2nd FS of this line. Voŕíśek and Cinek send the line too throwing down few tricks. Brzezik & Magda - you'll get it next time for sure!

I gathered footage from few trips to this magic place and put up short video using just a free-solo footage. Some of the ines in this short pieces are:

- "Czexas" Highline (22m L/22m H),
- "No Gods No Masters" Highline (28m L/28m H),
- "Rainmaker" aka "Free Some" Highline (14m L/35m H),
- "Playground" Highline (15m L/17m H),
- "Zkouřenka" Highline (21m L/35m H)

ENJOY!


Soon, I will write about more stories from Ostrov, put up more movies and maybe see you there!!

Peace & SlackOn!
Janek

Tuesday, May 22, 2012

Slackline Corner - Tensioning Methods, Introduction To The Pulley Systems - Part 1

So, after a long time I decided to post something and it happens to be a 2nd 'Slackline Corner' issue translated into english. I will try to translate all of them although it's a bit of work; I have 12 more to go. Besides 'Slackline Corner' translations, which is more gear-based topic, I will be posting lots of new and a bit older news, trying to make up for arrears.

Page 1

Page 2

PHOTOS DESCRIPTION:

Page 1:
- title photo: 'Jan Gałek on the 'Nun As Fuk' Highline' (photo by Wojtek Kozakiewicz)
- left bottom corner: 'Ratchet is a perfect method to tension 2" trickline webbings (on the photo preparing Surfline for the trickline contest during OutDoor Fait 2010) (photo: Jordan Tybon)',
right top corner: diagram; 'Colors: yellow - Ellington systems, red - chain hoist, black - pulley systems, purple - ratchets', 'Krótkie slacki/trickline = short lines/tricklines' (auth: Jan Gałek),
- right bottom corner: diagram for the description of the main pulley system parts.

Page 2: I think it doesn't need translation ;)

TEXT:

"The slackline season is almost at its peak and it is about time to refresh our knowledge a bit with a series of Slackline Corner articles. The last publications were about highline rigging, and in particular, about highline tensioning methods. 
We have already learned the process of highline-tensioning; now it is time to take a closer look at all of the different slackline tensioning systems, and the subsequent methods that accompany them. This theme is, not surprisingly, quite broad, so in this article I will describe only the basic concepts of tensioning systems; in the upcoming weeks I will focus on the finer details in Slackline Corners and my blog at www.goryonline.com.

The choice of your pulley system should be based on few things; whether it is for a longline, highline or trickline, the type of the webbing you are planning to use, and, of course, if you’re going to tension alone or with some friends.

There are quite few slackline tensioning methods, such as:

• Pulley systems,
• Ratchets,
• Ellington systems,
• Chain hoists.

All of these tensioning methods can be used alone or together. For example you can combine:

a) Ratchet with ellington system,
b) Chain hoist with pulley system.

The use of a pulley system is the most universal method for slacklining. With it, you can tension tricklines, waterlines, longlines and highlines. Of course, this doesn’t mean that you will always use the same configuration; the greatest advantage of this method its variability. You can use each element for many purposes (especially during highline projects which involve ascending, rappelling and/or hauling gear). The other benefit is that each component is replaceable, and if something is worn out, you can simply replace the one piece and continue using the same equipment for tensioning longer and longer lines. All of the other tensioning methods have built-in limitations, which you cannot overcome; principally, most systems are not suitable for longer lines, or in case of chain hoist, the weight of the equipment.

Pulley systems are easy to modify. Depending on your needs you can change its efficiency, weight and size with minimal effort. To illustrate this better I prepared a diagram presenting the differences of the given tensioning methods.

As you can see the pulleys system can be employed in every situation. The chain hoist comes in 2nd because there is little physical effort required for a lot of force, such as would be necessary for longer lines, but it is definitely not the best solution in every scenario. On the other hand, Ratchets and Ellington systems are wonderful solution for tensioning tricklines or short longlines. In this Slackline Corner I plan to focus on pulley systems, because while they are the most versatile, they are also the most complex. The rest of the tensioning methods will be presented together with the pros and cons of each in future editions of Slackline Corner.

Despite its complexity every pulley system will contain certain basic elements, such as:

a) Main Pulleys (always double pulleys),
b) Static Rope (9-11mm diamater),
c) Locking device (such as Gri-Gri, Eddy etc.),
d) Connecting elements (steel carabineers, quick-links, shackles),
e) Multiplier [basic multiplier 3:1 consists: connecting element (for example carabiner), camming device (for example Tibloc from Petzl) and one single pulley].

Go to my blog if you want to find more precise description about these elements (post: ‘Longline Abecadło – cz. 1 Sprzęt’).

Below you will find the most important aspects to consider in order to choose the right elements:

Main pulleys – for slacklining it is best to use double pulleys aligned ‘side-by-side’, as opposed to linear pulleys (for example, the Petzl ‘Tandem, which is more suitable for ziplining then tensioning lines). ‘Side-By-Side’ alignment allows for a larger sheave without losing pulley stability, and it also allows you to keep your tensioning system nice and compact. A larger sheave diameter increases the mechanical advantage, which in the end means higher efficiency. The second most important criterion is the strength of your pulley. Most pulleys are rated to about 36kN, which is more than enough for a 100-meter longline. If you’re planning on setting up lines longer than this, it is a good idea to spend your money on something stronger; the best would be around 50-60kN. Another thing to consider is the type of bearings under the sheaves, the most effective being sealed ball bearings; they create the least friction even under big loads. If you are planning to use your pulleys in high, alpine projects, you should also pay attention to the weight factor because when you have to carry lots of gear, lighter is always better,

Static rope – while choosing your rope you should pay attention to few things like the diameter (it has to be compatible with your pulleys and locking device), and the strength (most static ropes range from 9-11mm diameter and are rated to 22-30kN, enough for slackline purposes). You should, however, follow the same rules with your rope as your pulleys: longer slackline = stronger rope. The strength of the rope will also depend on the kind of pulley system, more strands equals less force on each strand of rope (for example in a 5:1 system, the force generated is divided between the 5 strands of rope inside the pulley system, in a 9:1 system between nine strands, etc.). The next important criterion is the rope stretch – the smaller the better, but most static ropes are around 13-15%. The last thing you should pay attention to is the material and the way the rope is made. It’s important that your rope be resistant to friction, high temperature, cuts, etc.,

Locking device – the most common models used in slacklining are: GriGri, GriGri 2, I’D, Rig (all from Petzl) and Edi (from Edelrid). In the upcoming Slackline Corner articles, I will describe in detail the differences between these devices, what's important to note is a minimum of 15kN breaking strength and the ability to release the device under tension. You can also check my blog for some more useful info,

Connecting elements – inside your slackline system, there should be only steel elements. This means steel shackles, quick-links and carabineers, all rated higher than 30kN. It is extremely dangerous to tension a line with aluminum carabineers! Aluminum gear can have invisible fractures and when they fail, they simply break, unlike steel, which bends before breaking completely. The only exception is the multiplier carabiner. The most basic multiplier is 3:1. As the name suggests, it multiplies the mechanical advantage of our basic pulley system (more info about it on my blog and in the next Slackline Corner).

We can divide pulley system into separate types based on their mechanical advantage ratio. We have, theoretically, and infinite number of configurations, but for our purposes, there are four basic pulleys systems: 5:1, 6:1, 9:1 and 10:1.
What does it mean? And how you know which one is which? I will try to explain using a 5:1 system as an example. A 5:1 system means two double pulleys on either end, the rope traverses each pulley then twice making 4 strands, and the 5th is then the free end of the rope coming out of the brake device. When we pull on this free end coming out of our brake, we are generating 5 times more force than if we pulled directly on the end of the slackline (ignoring friction). I will not make it more complicated by explaining the exact physics behind it, but if we combine our 5:1 pulley system with 3:1 multiplier, at the end our set-up will reach ratio of 15:1 (5 x 3 = 15). Considering that every healthy man or woman, using their weight and strength, can generate at least 100kg of force, it means that using this equipment they can tension a line to around 15kN (1,5t)!

The second criterion for differentiating pulley systems is the way the locking device is attached to the pulley system itself. We can find:

• Pulley system in which the locking device and the pulley system are clipped to two separate anchors (for example, two different spansets on the same tree),
• Pulley system in which the locking device and the pulleys are connected to a single point, such as a rigging plate, which is then fixed to the main anchor,
• Pulley system in which the locking device is attached inside the system to the becket on the main pulley. It is really important to remember attach the locking device sideways so it does not rub against the rope or other elements. You can achieve that by using two quick-links or twisted U/D-shackle.

Stay tuned for more detailed descriptions of pulley systems coming up in the next Slackline Corner and on my blog.

Peace & SlackOn!"

Last but not least I want to thank my friend Jordan Tybon for spellchecking my english translation of the article and suggesting few ideas and changes!!

Peace & SlackOn!

Sunday, February 19, 2012

"Pierożek" Highline

Despite bad weather outside the window it was finally time to start highline season 2012. We need to be fast with realization of our projects because of the (next) upcoming end of the world J. I had to stop my ‘heavy-longline training’ for sometime because of a especially low temperatures. It was a great opportunity to kick my own ass training hard at the climbing gyms, which was totally fine with me. Most of my upcoming highline projects for this year involve lots of climbing so it is good to built strong climbing base for it anyway. As the old proverb says “Every cloud has a silver lining”. I couldn't stand no highlining for too long. I started to miss it pretty bad and thinking a lot about my last trip to Moab (UT, USA) where I have walked 14 different lines free solo and 26 highlines in total. That was really good times.

Finally the moment was right and after short exchange of information with my good buddy Maciek Borucz aka. ‘Bor’ from Łódź in Poland, I have decided it was time ‘to rage hard again’. Together with Maciek and irreplaceable Rafał Kubiak aka. ‘Pigmej we were planning on rigging two lines located inside old quarries in Kielce area. Our common friend Magda Smorąg discovered the place for highlining and both lines have been rigged and sent before already by the gentlemen from Łódź. Even thought the lines have been sent already and the winter aura wasn’t really appealing the need to highline was way too strong. For these, which don’t know about which lines I am writing about, it were of course “Pierożek” Highline (17m length/12m height) and “Machete” Highline (33m length/20m height). Both highlines were rigged one year ago, using smaller or bigger trees as an anchor points. The decision about bolting the shorter line was made after conversation with Maciek and Rafał. “Pierożek” is a great line for all beginners; both ends are safe to start on, and the line offers ‘friendly’ exposure, height and length. During first rigging the total amount of all spansets used exceeded whole length of the line. That is why, in my opinion, it was totally worth to bolt it!


Maciej 'Bor' Borucz sending primary "Pierożek" Highline (Photo Dominik Kapusta) 

Magda Smorąg on the original "Pierożek" (Photo Dominik Kapusta)

After too many beers, hours on the train and in a car, plus not enough sleep we finally arrived. The rigging was preceded by approach in a snow up to our knees height. Digging in a snow to find a solid rock and deciding where to place the bolts in it took us the longest time. Drilling and bolting went really quick thanks to HILTI power drill and fully charged battery. We used three 12mm diameter expansion bolts per anchor. Two of them, which were the ‘main points’, where 15cm in length and the last back-up bolt was a bit shorter with 10cm in length. We encourage repeating the line! To build the anchors you will need 6 of the 12mm diameter hangers and two 1m spansets to equalize the points.


Pigmej adding some 'extra power' for his personal drilling slave (Photo Maciej Borucz) 

Unfortunately the days are still pretty short and we had just enough time to rig only one line. We are planning coming back for “Machete” in two weeks already. Furthermore we might check out and bolt some new lines in “Stokówka” quarry.


To check out "Machete" Highline take a look on this video from the FA:

Re-bolted short highline kept its name. Original “Pierożek” highline lost around one meter from its length of 18 meters. All three of us had a really good day with lots of amazing sends. I opened my highline season 2012 by sending “Pierożek” Highline OS-FM free solo with some surfing action (actually the surfing was way bigger when I was sending naked ... I don't know what is the connection between that facts) ... Maciek cruised across the line in a swami-belt and ‘Pigmej’ finally raged really hard and at the end walked his first highline in a swami. Both strongmen from Łódź throw lots of tricks and Maciek and I sent the line naked showing big middle … finger to the cold weather ;-) ...


On-Sight Free Solo, Full Man ascent (Photo Rafał Kubiak) 
Pigmej being 'so psyched brah!' (Photo Maciej Borucz)

Pigmej throwing down some sick double knee drop (Photo Maciej Borucz)

'Red Butt' in action (Photo Rafał Kubiak)

Getting ready for some naked surfin' action (Photo Rafał Kubiak)

Back in Łódź we were talking and planning while drinking beer again. It was an endless night. I think for sure we are not lacking motivation which I wish for all of you and myself. Keep the rage high! And in one week already I’m hoping to send some more lines – this time together with Maciek and Damian in Sokoliki.


You can take a look for more photos by clicking HERE (just scroll down to the photos at the bottom if you don't understand polish).

Peace & SlackOn!
Janek